
Mastering Star Jasmine Propagation: A Comprehensive Guide to Growing More of This Fragrant Vine
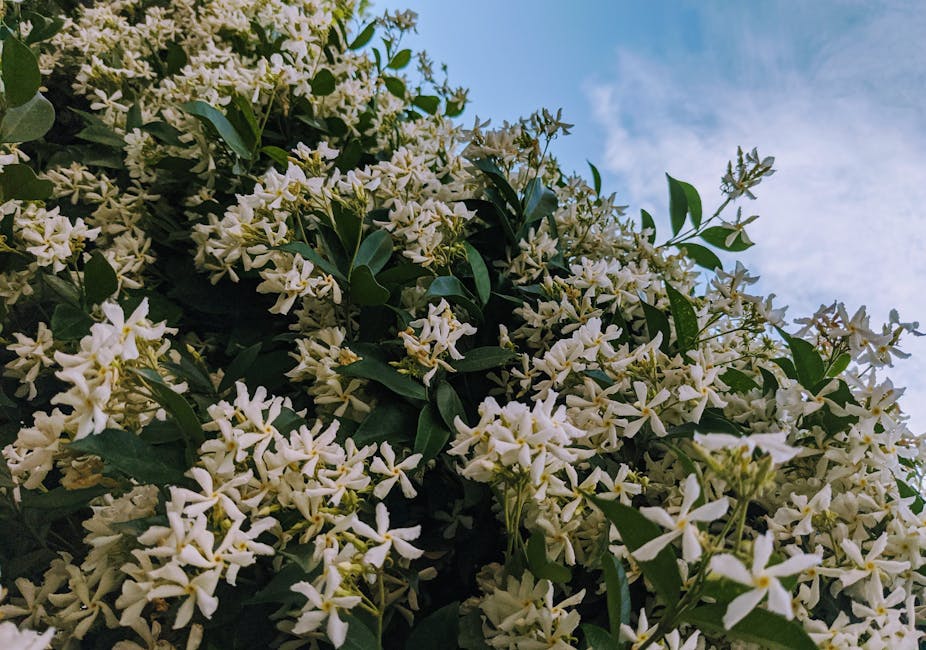
Star Jasmine (Trachelospermum jasminoides), with its intoxicating fragrance and lush, evergreen foliage, is a beloved climbing vine for gardens worldwide. Its popularity stems from its ease of care and stunning display of white, star-shaped blossoms. But what if you want to expand your fragrant haven? Propagating Star Jasmine allows you to effortlessly multiply this beautiful plant and share it with friends or create a breathtaking living wall. This comprehensive guide will walk you through various propagation methods, ensuring success every time.
Understanding Star Jasmine Propagation Methods
There are several ways to successfully propagate Star Jasmine, each with its own set of advantages and disadvantages. The most common methods include:
- Cuttings (Stem Cuttings): This is perhaps the most popular and straightforward method, offering a high success rate with minimal effort.
- Layering: A technique that involves encouraging roots to develop on a stem while it’s still attached to the parent plant.
- Air Layering: A variation of layering, particularly effective for propagating higher branches.
- Seed Propagation (Less Common): While possible, seed propagation is less reliable and often results in plants with varied characteristics compared to the parent plant.
The Cutting Propagation Method: A Step-by-Step Guide
This is the most recommended method for its simplicity and high success rate. Here’s a detailed guide:
1. Selecting and Preparing Cuttings
Choose healthy, semi-hardwood stems from the current year’s growth. These stems are neither too soft nor too woody. The ideal time for taking cuttings is during spring or early summer when the plant is actively growing. Each cutting should be about 4-6 inches long, with at least 2-3 sets of leaves. Use sharp, clean pruning shears to make a clean cut, avoiding crushing or damaging the stem.
2. Removing Lower Leaves
Remove the lower leaves from the cutting, leaving only the top 2-3 sets. This prevents rot and allows for better concentration of energy on root development.
3. Treating the Cuttings
Dipping the cut end in rooting hormone powder significantly increases the success rate. This hormone stimulates root growth. Follow the instructions on the rooting hormone packaging carefully.
4. Planting the Cuttings
Use a well-draining potting mix, such as a blend of peat moss, perlite, and vermiculite. Plant the cuttings about 2 inches deep, ensuring good soil contact around the stem. Gently firm the soil around the base.
5. Providing Ideal Conditions
Place the cuttings in a warm, humid environment. A propagator or humidity dome is ideal. Keep the soil consistently moist but not waterlogged. Avoid direct sunlight, opting for bright, indirect light. Regular misting helps maintain humidity levels.
6. Monitoring and Patience
Root development takes time, usually several weeks to a few months. Avoid disturbing the cuttings during this crucial period. Once you observe new growth, you’ll know that roots have formed. Carefully check the soil moisture regularly to avoid overwatering.
Layering and Air Layering Methods
Layering involves encouraging root development on a stem while it’s still attached to the parent plant. This method is less demanding than cuttings, as the stem already benefits from the parent plant’s resources.
Layering:
Select a low-lying, flexible stem. Score a small section of the stem’s bark, then bury this section in the soil, ensuring the top part of the stem remains above the ground. Keep the buried section moist. Roots should form in several months. Once rooted, you can carefully detach the new plant from the parent.
Air Layering:
Ideal for higher branches, air layering involves wounding the stem, wrapping it with moist sphagnum moss, and covering it with plastic wrap. This creates a humid environment to encourage root growth. Once roots have formed (check after several months), cut the stem below the rooted section and pot the new plant.

Seed Propagation: A Less Reliable Option
While Star Jasmine produces seeds, this method is less reliable. Germination rates can be low, and the resulting plants may not always exhibit the same traits as the parent plant. If you choose this method, sow seeds in a well-draining seed-starting mix and maintain consistent moisture and warmth.
Troubleshooting and Common Issues
- Rotting Cuttings: Overwatering is the primary cause. Ensure good drainage and avoid waterlogging.
- Failure to Root: Poor rooting hormone, insufficient humidity, or lack of warmth can hinder root development.
- Pest Infestations: Monitor for pests like aphids or mealybugs. Treat promptly with appropriate insecticides.
Conclusion
Propagating Star Jasmine is a rewarding experience that allows you to expand your collection of this fragrant beauty. By following these detailed steps and paying attention to the specific requirements of each propagation method, you can ensure a high success rate and enjoy the delightful scent of Star Jasmine for years to come. Remember patience is key. Don’t get discouraged if you don’t see immediate results, and enjoy the process of nurturing your new plants.
